How to use Maven with Apache Camel
Maven and Camel, they go hand in hand, like… potatoes and gravy. Or chicken and chips*.
This is a guide on how to use Maven with Camel, and the main things you need to know.
But before we dive in, I have to be honest.
I used to really hate Maven. It can be horribly complex, and it complains about everything.
But, once you’ve mastered it, it’s the quickest way to create, compile and run Camel apps. And in this article I’m going to introduce the basic features of Maven when working with Camel, so that you can learn quicker than I did.
In this article, I’m going to be mostly using Maven at the command line, rather than using an IDE like Eclipse or IntelliJ. But I think this is the best way to figure out Maven’s quirks, by getting hands-on.
To follow this guide you’ll need to install Maven and Java.
So let’s dive right in to this guide to using Maven with Camel, starting with one of the most useful things for beginners.
Create a Camel project with Maven
Do you want to create a new Camel project without having to code everything from scratch?
Do you want to use best practices when setting up a Camel project?
Then you need … an archetype!
An archetype is basically a template or blueprint that helps you quickly create a new project.
Archetypes are a feature of Maven. When you’re starting a new project, pick an archetype that best suits your project, and Maven will create a new project for you. This gets you up and running fast.
If you’ve followed my Apache Camel tutorial on this site, then you’ve seen a Camel archetype in action already. Camel provides several archetypes for you to choose from.
Here I’ll demonstrate how to create a new Camel project from the Java archetype, using the Maven command line utility.
Here’s what you need to do:
-
First you need to make sure that Maven is installed and on your PATH. (So that when you type
mvn, it runs Maven) -
Open up your terminal or command window, and type this:
mvn archetype:generate -DarchetypeGroupId=org.apache.camel.archetypes -DarchetypeArtifactId=camel-archetype-javaThis starts the archetype generator in Maven, using the archetype named camel‑archetype‑java. This creates a simple Camel project using the basic Java DSL syntax.
Maven will then download the Camel artifacts it needs to create your project. (If you have problems downloading at this point, and you are behind a web proxy, you will need to add proxy details into your Maven settings file)
-
When prompted, fill in the details of your new app:
- groupId: com.example
- artifactId: mycamel (Or any name you like)
- version: (Hit Enter to accept the default, 1.0-SNAPSHOT)
- package: (Hit Enter to accept the default)
Then press Y when prompted to confirm and create the project.
-
Maven will create your new Camel app. When it has finished, you’ll see BUILD SUCCESS in your Terminal window.

-
Once you’ve created your project from the archetype, you can start editing it immediately.
Or, if you want to load the project in your favourite IDE, then you can use one of these commands:
mvn idea:idea- turns your project into an IntelliJ IDEA project.mvn eclipse:eclipse- turns your project into an Eclipse project.
-
Now you’re ready to start Camel riding!
What Camel archetypes are available?
In the example above, I just created a project using the Camel Java archetype.
There are lots of other Camel archetypes available, to suit different types of project. Here are some of the more common ones:
- camel-archetype-spring - Creates a new Camel project that uses the Spring DSL approach to building Camel routes.
- camel-archetype-blueprint - Creates a new Camel project with OSGi Blueprint - e.g. if you’re using Apache Karaf, Apache ServiceMix, JBoss Fuse, Talend ESB.
- camel-archetype-activemq - Creates a new Camel project that configures and interacts with ActiveMQ
- camel-archetype-component - Creates a new Camel component (e.g. if you want to write your own custom components for Camel)
- camel-archetype-spring-boot - Creates a new Camel project using Spring Boot
You don’t need to know every single one of these. But don’t forget that they’re there for you to use.
To browse the available archetypes, first make sure Maven is installed, then type:
mvn archetype:generate
Which will present you a list of archetypes to choose from. You can enter the filter text ‘camel’ to show only the Camel-related archetypes.
Add Camel to an existing project
If you have an existing project and you want to add Camel to it, you should add the Camel dependency to your Maven POM.
Camel is modular, so you only need to include the modules you want to use. This keeps it lightweight.
To do this, you need to edit your Maven pom.xml to add the camel-core Maven dependency.
Find the <dependencies> section of your POM, and add in the dependency in the block below:
<dependencies>
  ...

  <dependency>
    <groupId>org.apache.camel</groupId>
    <artifactId>camel-core</artifactId>
    <version>2.18.2</version>
  </dependency>

</dependencies>
This lets you start a Camel Context and build basic routes.
This won’t create any example routes for you. You’ll need to write those yourself.
Introducing the Camel Maven plugin
Once you’ve created your Camel project, and you’ve started creating routes, you’re probably going to want to run your app.
Fortunately, Camel also has another tool that helps you do the job.
It’s called the Camel Maven Plugin.
So, what does it do?
The Camel Maven Plugin has two main functions:
- To help you run your Camel routes from Maven
- To validate your routes (new feature from Camel 2.19)
You first need to ensure that the Camel Maven Plugin is in your POM, like this:
<plugins>
  ...

  <plugin>
    <groupId>org.apache.camel</groupId>
    <artifactId>camel-maven-plugin</artifactId>
  </plugin>
</plugins>
Once the plugin is declared in your POM, you can access its functions by using the camel prefix with the mvn command:

You can check the documentation to find out more about what the Camel Maven Plugin can do, or you can type the following command to see the complete list of goals and options for the plugin:
mvn help:describe -Dplugin=org.apache.camel:camel-maven-plugin -Ddetail
This will show you the complete list of goals and options that you can set:
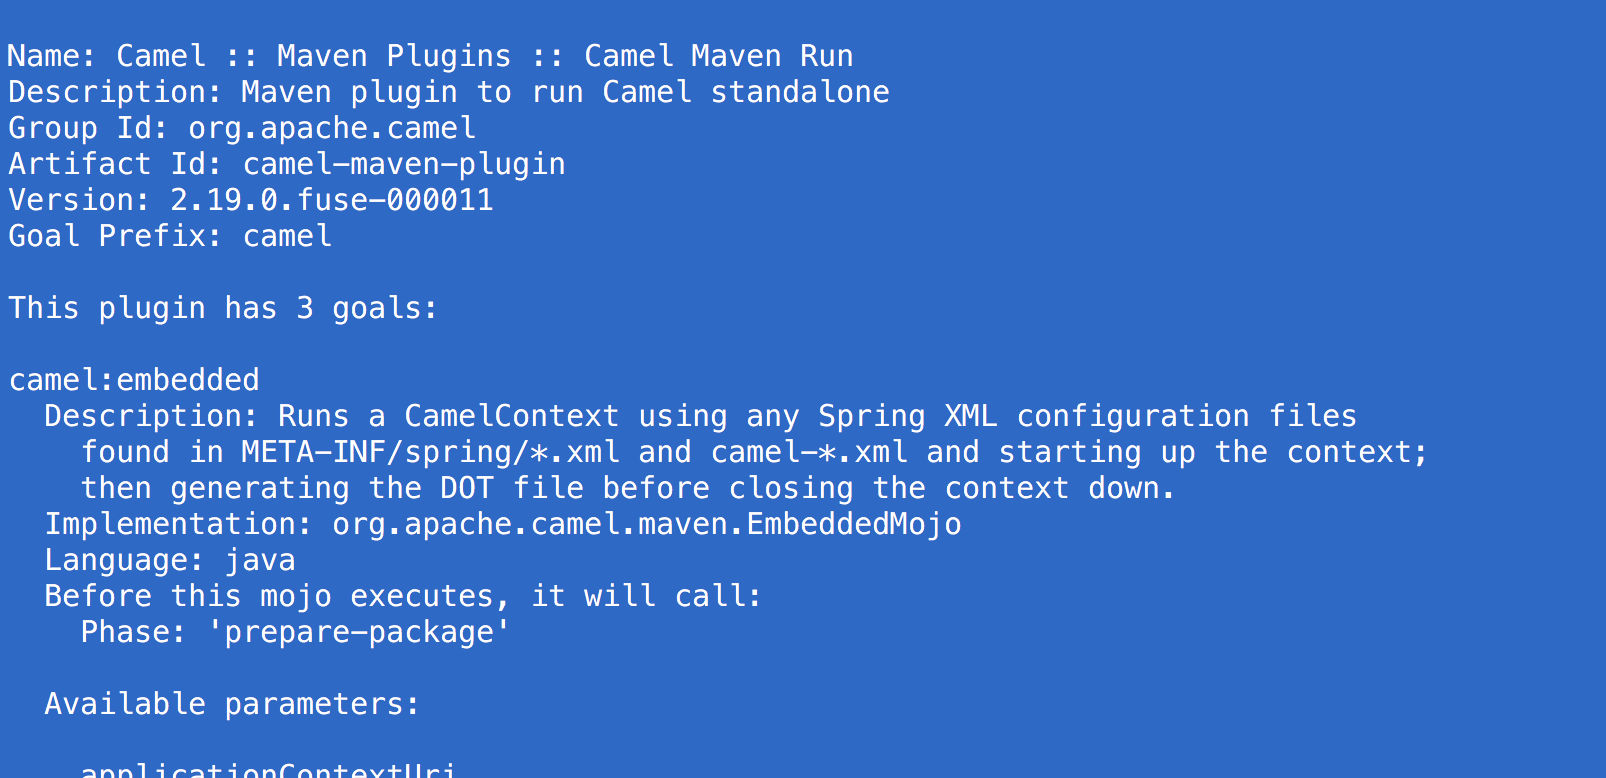
How to run a Camel app using Maven
Now you’ve seen how to create a Camel app using an archetype, add Camel to an existing project, and how to add the Camel Maven plugin, I’m going to move on to how to run your app.
There are three main goals that you can use to run your Camel app, and which you use depends on how you are using Camel. I’ll go through each of them now.
Using mvn camel:run 🐪🏃
I’ll start with camel:run, because it’s the most common way of running your Camel projects using Maven. This goal comes with the Camel Maven Plugin.
To use this goal, your Camel app must be configured using Spring, Blueprint or CDI.
- Spring - everyone’s favourite fun friendly framework
- Blueprint - used when running your app inside an OSGi container, such as Apache Karaf.
- CDI - the Java standard for dependency injection
(If you’re not sure which one of these to use, just go with Spring for now)
The Camel Maven plugin weaves some special magic to determine which of these frameworks you’re using, and then automatically fires up your Camel routes.
Then, to run your Camel app, you just type:
mvn camel:run
Using mvn exec:java 🐪▶️☕️
Another way to run your Camel apps is with the exec:java Maven goal. This goal is included in the exec-maven-plugin for Maven.
This goal can be used for running all sorts of Java apps, not just Camel.
It is designed for running simple Java command-line apps that have a main() method. So you need to have a main() method which starts your Camel routes.
If you use the camel-archetype-java archetype (see the section above on archetypes), then Maven will create a class with a main method for you, similar to this:
package com.example;

import org.apache.camel.main.Main;

/**
 * A Camel Application
 */
public class MainApp {

    /**
     * A main() so we can easily run these routing rules in our IDE
     */
    public static void main(String... args) throws Exception {
        Main main = new Main();
        main.addRouteBuilder(new MyRouteBuilder());
        main.run(args);
    }

}
This piece of code does the following:
- Creates a new instance of the
Mainclass, which is a helper class that comes with Camel. - Adds your Camel routes, assuming you’ve defined them in a class called
MyRouteBuilder. - Runs your Camel routes!
To run a Camel app like this from Maven, you just add exec-maven-plugin as a plugin in your POM, like this:
<plugin>
  <groupId>org.codehaus.mojo</groupId>
  <artifactId>exec-maven-plugin</artifactId>
  <configuration>
    <mainClass>com.example.project.MainApp</mainClass>
  </configuration>
</plugin>
You need to specify the class that contains your main() method, in the mainClass tag above.
Then, to run the Camel app, you can just go to your project’s home directory and type:
mvn compile exec:java
Using mvn spring-boot:run 🐪🍃🏃🏻
This final way of running a Camel app using Maven is only for when you’re using Spring Boot.
Spring Boot is a way of building your apps, where some dependencies are chosen for you, based on the type of project you’re building, and some standard features are configured for you out of the box. Spring calls this “opinionated”.
A compiled Spring Boot app contains the application and all of its dependencies in a single JAR file. (It’s sometimes called a ‘fat jar’, because the JAR file contains everything)
Because Spring Boot packages apps slightly differently, you need to use its own dedicated plugin for Maven, the Spring Boot Maven Plugin.
Assuming that you’ve used the Spring Boot Camel Maven archetype to create your project, you will need to run your app in a slightly different way.
First you need to run:
mvn install
This will compile your app to a “fat-jar” and install it into your local Maven repository. (This is usually in .m2/repository in your home directory.)
Then, type:
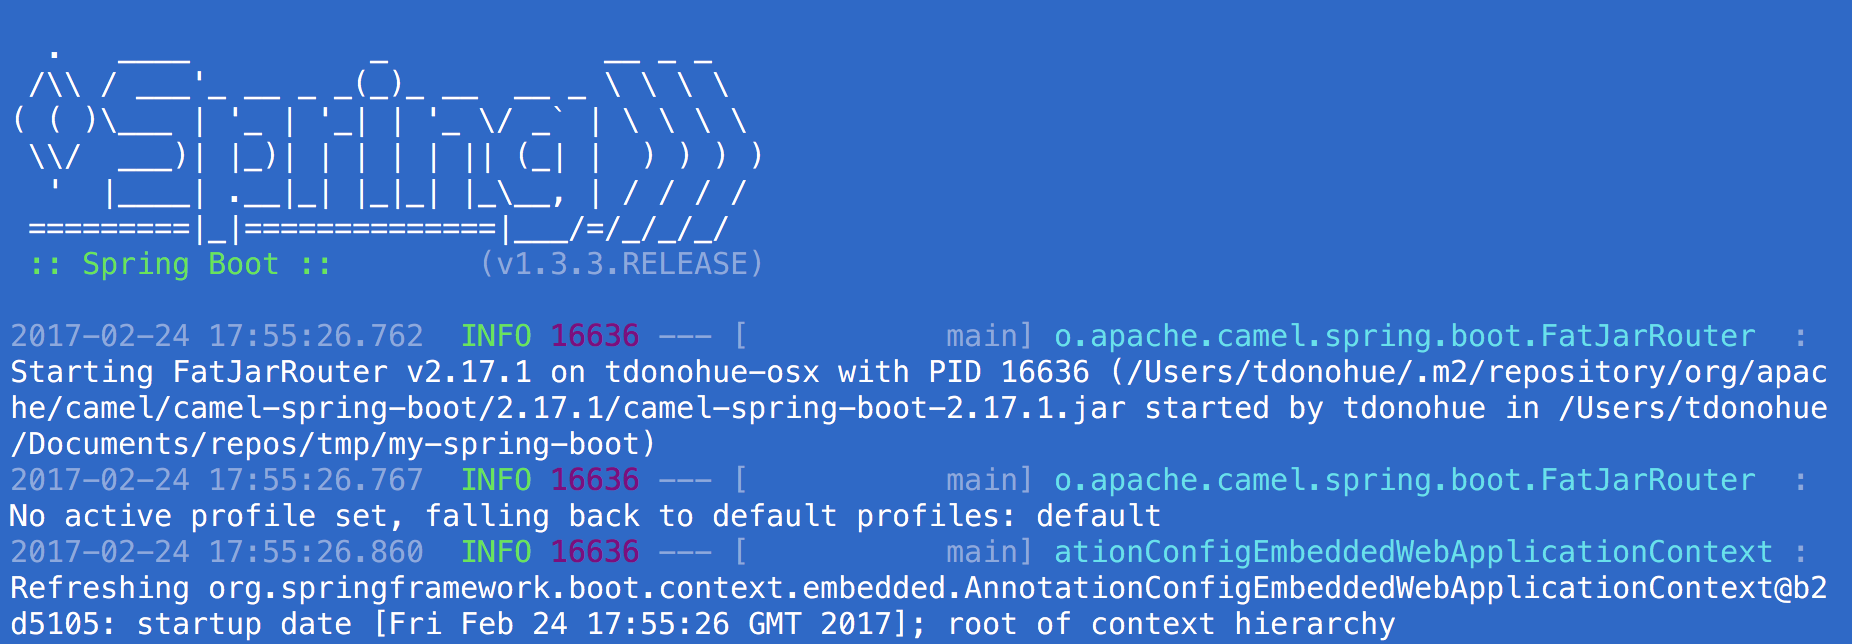
mvn spring-boot:run
This will run your app. You’ll know it’s a Spring Boot app because you’ll see some pretty colours when it starts up:
The best way to learn
Now that you’ve learned about what’s possible with Maven, the best way to see Maven and Camel working together is in the examples that come with the Camel distribution.
So, to get started with Maven and Camel:
-
Ensure you have Java and Maven installed
-
Download the latest release of Apache Camel
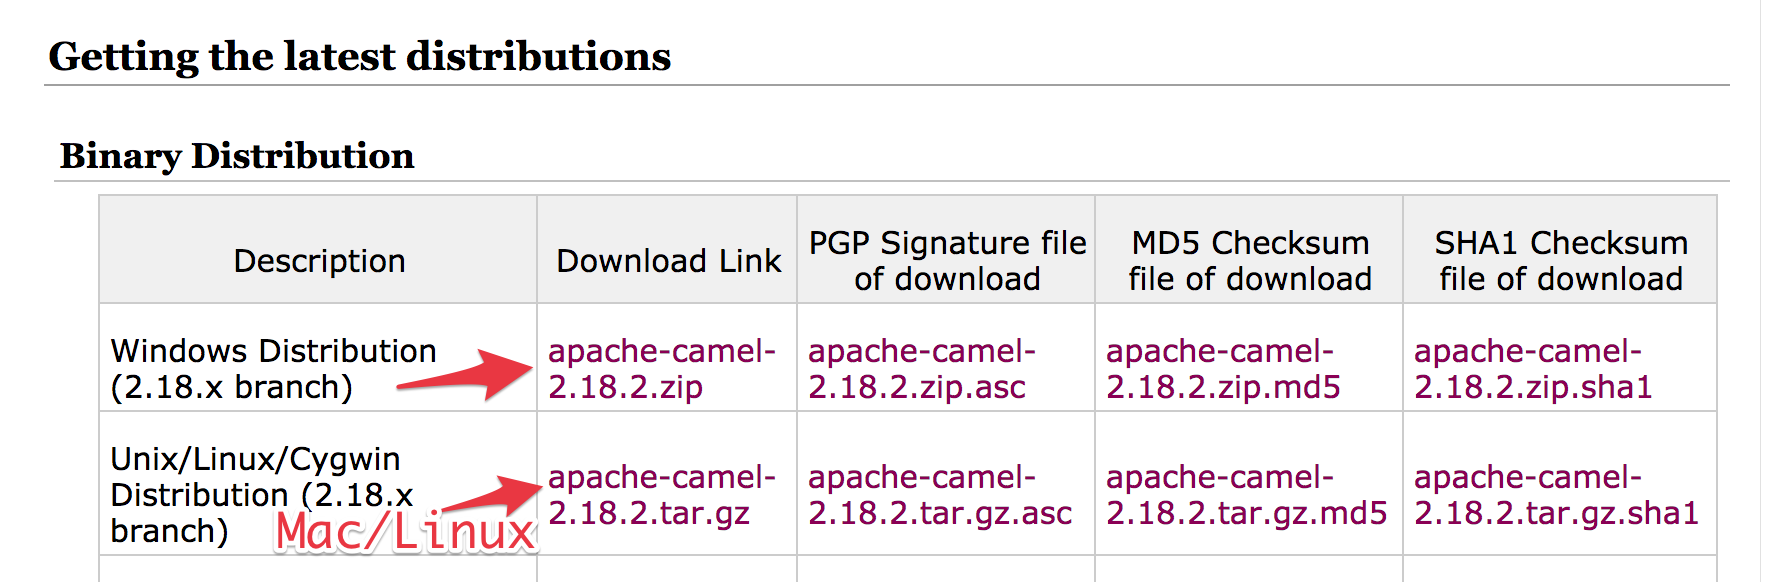
- Extract the ZIP or TAR file on your hard disk
- Browse to the camel
examples/directory. - Open any of the examples and have a look at the README. (I recommend the camel-example-spring project)
Now, go build cool stuff!
* aka fries
PS: This post has tried to cover the main things you need to know about using Maven with Apache Camel. But if there’s something else that you’d like to see added, please let me know by suggesting it in the comments box below!