Event-driven integration on Kubernetes with Camel & KEDA
I’ve been working with a team this week who are investigating how they could use AWS Lambda for data processing. The process is vaguely something like this:
-
write some data processing logic
-
spin it up when an event happens (e.g. a message arrives on an SQS queue)
-
terminate when finished.
So they want to use AWS Lambda for this, to make it scalable and serverless. These are going to create lightweight bits of data transformation logic, driven by events, that use minimal compute power. Sounds good so far.
However, I wondered whether it was possible to do something similar with the current field of Kubernetes alternatives. I prefer to look at options for Kubernetes because, although it does have a steep initial learning curve, solutions for K8s are less tightly coupled to the cloud provider (AWS) and so way more portable.
KEDA: Kubernetes Event-Driven Autoscaling
After digging around for a little while, I found KEDA - Kubernetes Event-Driven Autoscaling. This is quite new and backed by Microsoft (Azure).
KEDA is a way of auto-scaling applications in Kubernetes based on an external metric. The metrics are collected by a set of Scalers which support things like:
-
ActiveMQ Artemis
-
Apache Kafka
-
Amazon SQS
-
Azure Service Bus
-
and lots more….
The basic idea is that a KEDA Scaler monitors one of these objects for a metric. The metric is usually something like the number of messages on a queue.
When the metric goes above a certain threshold, KEDA can scale up a Deployment automatically (called “Scaling Deployments”), or create a Job (called “Scaling Jobs”). It can also scale down Deployments when the metric goes down.
It does this by creating a Horizontal Pod Autoscaler (HPA).
So KEDA is more concerned with scaling applications based on an external metric. I can think of many potential use cases for this, but I think primarily I’m interested in scaling up Pods when messages are received on a queue. This is very useful, because I often work with message queues as a way of providing events to an application. The queues are entirely external to the app, so it makes sense that the scaling should be external too.
And when I think of messaging, of course I immediately think of ActiveMQ and Camel and how KEDA could be used. I think I feel an example coming on….
KEDA example: Apache Camel and ActiveMQ
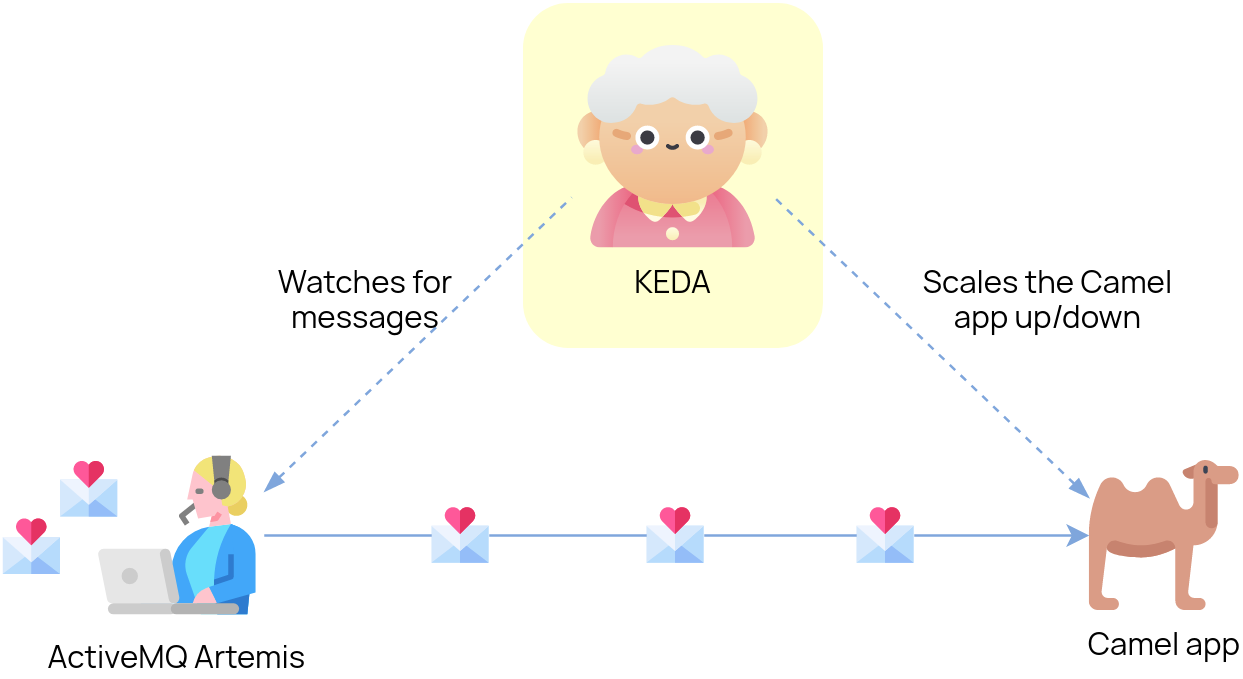
We’re going to see what KEDA can do by deploying a demo application which will consume messages from a queue. We’ll use ActiveMQ Artemis as the message broker, and use KEDA’s Artemis scaler to watch for messages on the queue and scale the application up or down.
About the demo app
I’ve created an example Camel app which uses Quarkus as the runtime. I’ve published the image to Docker Hub and I use that in the steps further below. But if you’re interested in how it was created, read on.
Get the code on GitHub Get the image on Docker Hub
I decided to use Quarkus because it boasts super-fast startup times, way faster than Spring Boot. When we’re reacting to events, we want to be able to start up quickly and not wait 30-60 seconds for the app to start.
To create the app, I used the Quarkus app generator.
As Quarkus is configured using extensions, I needed to find a Quarkus extension which would help me create a connection factory to talk to ActiveMQ Artemis. So I’m using the Qpid JMS Extension for Quarkus, which wraps up the Apache Qpid JMS client for Quarkus applications. This allows me to talk to ActiveMQ Artemis using the nice, open AMQP 1.0 protocol.
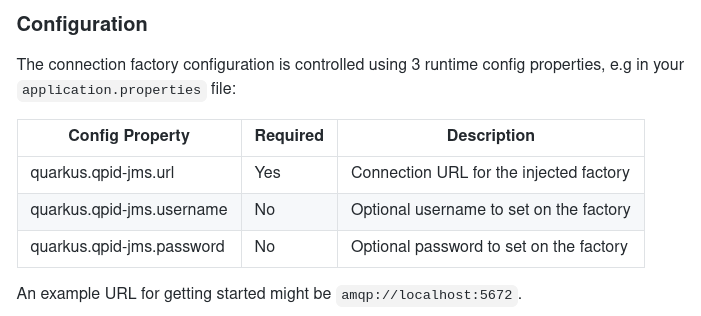
The Qpid JMS extension creates a connection factory to ActiveMQ when it finds certain config properties. You only need to set the properties quarkus.qpid-jms.url, quarkus.qpid-jms.username and quarkus.qpid-jms.password. The Extension will do the rest automatically, as it says in the docs:
Then, I use Camel’s AMQP component to actually consume the messages. This will detect and use the connection factory created by the extension.
I’ve compiled and packaged the application into a native binary, not a JAR. This will help it to start up very fast. You need GraalVM to be able to do this.
./mvnw package -Pnative
Or, if you don’t want to install GraalVM, you can tell Quarkus to use a helper container with GraalVM baked in, in order to build the native image. You’ll need Docker running for this, of course:
./mvnw package -Pnative -Dquarkus.native.container-build=true
The output from this is a native binary which should start up faster than a typical JVM-based application. Nice. Good for rapid scale-up when we receive a message!
Finally, I built a container image with Docker and pushed it up to Docker Hub. There’s a Dockerfile provided with the Quarkus quickstart to do the build, and then it’s an easy docker push:
docker build -f src/main/docker/Dockerfile.native -t monodot/camel-amqp-quarkus .
docker push monodot/camel-amqp-quarkus
Now we’re ready to deploy the app, deploy KEDA and configure it to auto-scale the app.
Deploying KEDA and the demo app
-
First, install KEDA on your Kubernetes cluster. You’ll probably need to have cluster-admin permissions to be able to do this.
If you need a Kubernetes cluster of your own, you can use Minikube or a cloud offering like Amazon’s EKS. Read about my experiences with EKS on AWS).
To install KEDA, you should probably follow the instructions on the KEDA web site, but I installed it with Helm like this:
$ helm repo add kedacore https://kedacore.github.io/charts $ helm repo update $ kubectl create namespace keda $ helm install keda kedacore/keda --namespace keda -
Create a namespace for our demo.
kubectl create namespace keda-demo -
Now we need to deploy an ActiveMQ Artemis message broker.
Here’s some YAML to create a Service and Deployment for it in Kubernetes. It uses the
vromero/activemq-artemiscommunity image of Artemis on Docker Hub, and exposes its console and amqp ports. I’m customising it by adding a ConfigMap which:-
Changes the internal name of the broker to a static name:
keda-demo-broker -
Defines one queue, called
ALEX.HONKING. If we don’t do this, then the queue will be created when a consumer connects to it, but it will be removed again when the consumer disappears, and so KEDA will just get confused. So we define the queue first.
$ kubectl apply -f - <<API apiVersion: v1 kind: List items: - apiVersion: v1 kind: Service metadata: creationTimestamp: null name: artemis namespace: keda-demo spec: ports: - port: 61616 protocol: TCP targetPort: 61616 name: amqp - port: 8161 protocol: TCP targetPort: 8161 name: console selector: run: artemis status: loadBalancer: {} - apiVersion: apps/v1 kind: Deployment metadata: creationTimestamp: null labels: run: artemis name: artemis namespace: keda-demo spec: replicas: 1 selector: matchLabels: run: artemis strategy: {} template: metadata: creationTimestamp: null labels: run: artemis spec: containers: - env: - name: ARTEMIS_USERNAME value: quarkus - name: ARTEMIS_PASSWORD value: quarkus image: vromero/activemq-artemis:2.11.0-alpine name: artemis ports: - containerPort: 61616 - containerPort: 8161 volumeMounts: - name: config-volume mountPath: /var/lib/artemis/etc-override volumes: - name: config-volume configMap: name: artemis - apiVersion: v1 kind: ConfigMap metadata: name: artemis namespace: keda-demo data: broker-0.xml: | <?xml version="1.0" encoding="UTF-8" standalone="no"?> <configuration xmlns="urn:activemq" xmlns:xsi="http://www.w3.org/2001/XMLSchema-instance" xsi:schemaLocation="urn:activemq /schema/artemis-configuration.xsd"> <core xmlns="urn:activemq:core" xsi:schemaLocation="urn:activemq:core "> <name>keda-demo-broker</name> <addresses> <address name="DLQ"> <anycast> <queue name="DLQ"/> </anycast> </address> <address name="ExpiryQueue"> <anycast> <queue name="ExpiryQueue"/> </anycast> </address> <address name="ALEX.HONKING"> <anycast> <queue name="ALEX.HONKING"/> </anycast> </address> </addresses> </core> </configuration> API -
-
Next, we deploy the demo Camel Quarkus AMQP consumer application, and add some configuration.
So we create a Deployment. I’m deploying my demo image
monodot/camel-amqp-quarkusfrom Docker Hub. You can also deploy my image, or you can build and deploy your own image if you want.We use the environment variables
QUARKUS_QPID_JMS_*to set the URL, username and password for the ActiveMQ Artemis broker. These will override the propertiesquarkus.qpid-jms.*in my application’s properties file:$ kubectl apply -f - <<API apiVersion: apps/v1 kind: Deployment metadata: creationTimestamp: null labels: run: camel-amqp-quarkus name: camel-amqp-quarkus namespace: keda-demo spec: replicas: 1 selector: matchLabels: run: camel-amqp-quarkus strategy: {} template: metadata: creationTimestamp: null labels: run: camel-amqp-quarkus spec: containers: - env: - name: QUARKUS_QPID_JMS_URL value: amqp://artemis:61616 - name: QUARKUS_QPID_JMS_USERNAME value: quarkus - name: QUARKUS_QPID_JMS_PASSWORD value: quarkus image: monodot/camel-amqp-quarkus:latest name: camel-amqp-quarkus resources: {} API -
Now we tell KEDA to scale the pod down when there are no messages, and back up when there are messages.
We do this by creating a
ScaledObject. This tells KEDA which Deployment to scale, and when to scale it.$ kubectl apply -f - <<API apiVersion: keda.k8s.io/v1alpha1 kind: ScaledObject metadata: name: camel-amqp-quarkus-scaler namespace: keda-demo spec: scaleTargetRef: deploymentName: camel-amqp-quarkus pollingInterval: 30 cooldownPeriod: 30 # Default: 300 seconds minReplicaCount: 0 maxReplicaCount: 2 triggers: - type: artemis-queue metadata: managementEndpoint: "artemis.keda-demo:8161" brokerName: "keda-demo-broker" username: 'QUARKUS_QPID_JMS_USERNAME' password: 'QUARKUS_QPID_JMS_PASSWORD' queueName: "ALEX.HONKING" brokerAddress: "ALEX.HONKING" queueLength: '10' APIBy the way, to get the credentials to use the Artemis API, KEDA will look for any environment variables on the Deployment pods of the Camel app This means you don’t have to specify the credentials twice :-) So here, I’m using
QUARKUS_QPID_JMS_USERNAMEand_PASSWORD. They reference the environment variables on the demo app’s Deployment. -
Now let’s put some test messages onto the queue.
You can do this in a couple of different ways: either point and click using the Artemis web console, or use the Jolokia REST API.
Either way, we need to be able to reach the
artemisKubernetes Service, which isn’t exposed outside the Kubernetes cluster. You can expose it by setting up an Ingress, or a Route in OpenShift, but I just use kubectl’s port forwarding feature instead. It’s simple. This allows me to access the ActiveMQ web console and API onlocalhostport8161:kubectl port-forward -n keda-demo svc/artemis 8161:8161Leave that running in the background.
Now, in a different terminal, hit the Artemis Jolokia API with
curl, via the kubectl port-forwarding proxy. We want to send a message to an Artemis queue called ALEX.HONKING.This part requires a ridiculously long API call, so I’ve added some line breaks here to make it easier to read. This uses ActiveMQ’s Jolokia REST API to put a message in the Artemis queue:
curl -X POST --data "{\"type\":\"exec\",\
\"mbean\":\
\"org.apache.activemq.artemis:broker=\\\"keda-demo-broker\\\",component=addresses,address=\\\"ALEX.HONKING\\\",subcomponent=queues,routing-type=\\\"anycast\\\",queue=\\\"ALEX.HONKING\\\"\",\
\"operation\":\
\"sendMessage(java.util.Map,int,java.lang.String,boolean,java.lang.String,java.lang.String)\",\
\"arguments\":\
[null,3,\"HELLO ALEX\",false,\"quarkus\",\"quarkus\"]}" http://quarkus:quarkus@localhost:8161/console/jolokia/
(If you have any issues with this, just use the Artemis web UI to send a message, it’s at
http://localhost:8161/console)All good!
You put messages in the queue, you should see the Camel app pod starting up and consuming the messages.
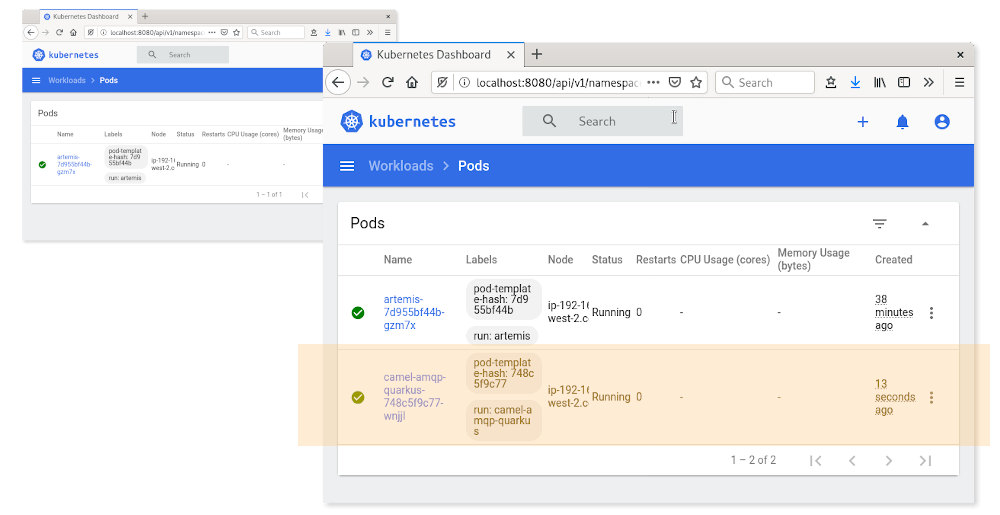
After all messages are consumed, there will be no messages left on the queue. KEDA waits for the cooldown period (in this demo I’ve used 30 seconds as an example), and then scales down the deployment back to zero, so there are no pods running.
This is autoscaling… in action!
Epilogue: You forgot Knative
So you’ve probably noticed that I didn’t mention Knative.
I started my research by looking at Knative. Knative is a beast of a project. It was announced a couple of years ago and is backed by Google.
There are a couple of major parts to Knative, but the interesting ones to me are:
-
Knative Serving - this is the “serverless apps” part. It can create a Pod from nothing when a web request is received, and then delete the Pod when it’s no longer needed. This basically allows you to have microservices that run only when needed, but is heavily focused on APIs. Knative Serving can also do more complex things like managing multiple versions of the same app. But that’s beyond the scope of today’s post.
-
Knative Eventing - is the other half of the project, which is about making “events” a native concept in Kubernetes, and decoupling producers and consumers. You can then write apps which respond to these events.
I thought Knative Eventing might be able to create Pods when a particular event is received - in other words, autoscaling Pods based on an event. But after bit of digging, it seems that autoscaling in Knative Eventing is still a work in progress. At the time I had a look at it (July 2020), it’s still in the proposal stage:
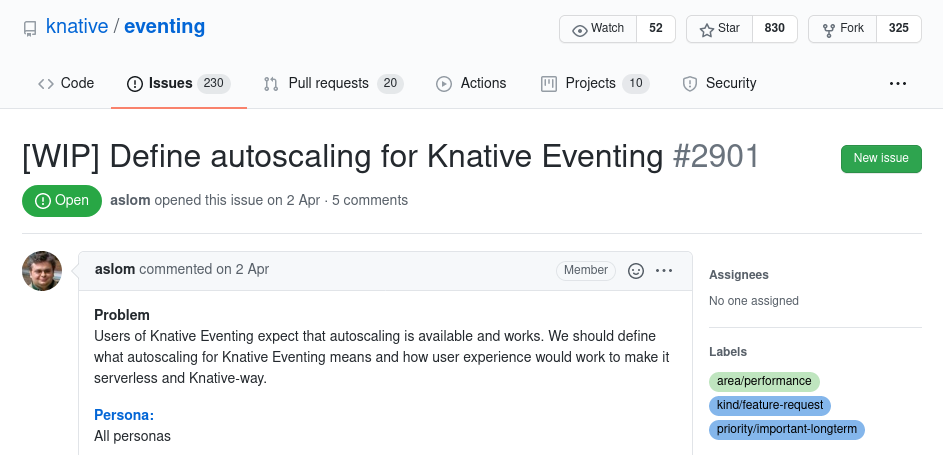
I think that means that Knative is out of the running. For now….