S2I builds in OpenShift - an example with Java and Maven
You’ve kicked the tyres with OpenShift and deployed an app or two. Now you want to start building your container images inside OpenShift. But how do you do it? One way is using S2I, or source-to-image builds.
OK, let’s take a look at S2I builds in OpenShift.
What exactly is a BuildConfig?
A build in OpenShift is defined by a BuildConfig.
A BuildConfig is just a set of instructions which tell OpenShift how to build a container image. It defines things like:
-
the strategy to use - this describes the workflow that will be used to build the image. There are a couple of different strategies, but for now I’m just going to talk about source-to-image
-
where the source for your image is located - for example, your application’s source code.
-
the image name and tag where OpenShift should push the image once it’s been built.
A BuildConfig is like most other objects in OpenShift: it’s usually written as JSON or YAML and then applied to the cluster using the oc command.
Creating a BuildConfig
Once you’ve developed an app, and you want to start building a container image for it inside OpenShift, you need to create a BuildConfig.
You can do this in a few different ways:
-
Use OpenShift’s
oc new-buildcommand to create a new build. -
Write your own BuildConfig by hand (uuuuuuuuuurrrrrgh)
-
Use the Fabric8-Maven-Plugin, which inspects your application and creates the necessary OpenShift objects for you
For this quick intro to OpenShift S2I, I’m just going to focus on the first option, using oc new-build.
Source-to-Image (S2I) builds
But first….what is S2I?
A source-to-image build, or S2I build, is where OpenShift builds a container image from your application’s source code or binary. This is done using the Source-To-Image feature of OpenShift.

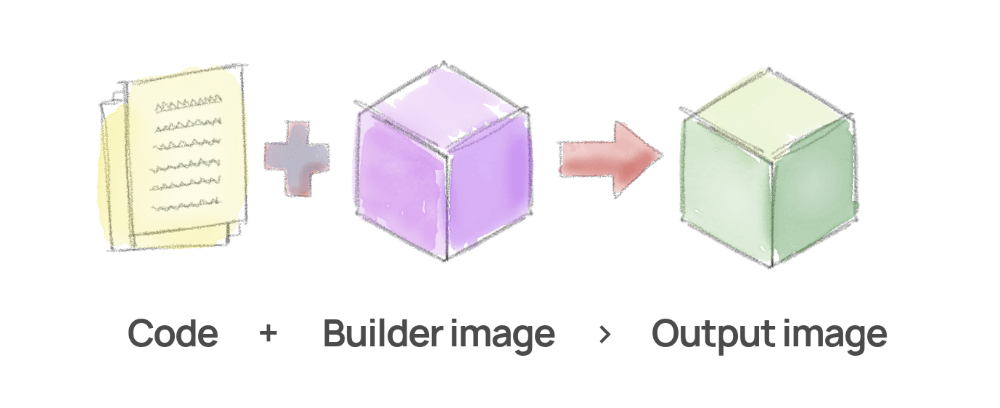
OpenShift can clone your source code from Git (or use an existing binary, like a Java JAR), inject that into a builder image, and use that to produce a final image for your app, which you can then run on OpenShift.
Creating S2I builds using the oc new-build command
To build an app on OpenShift using S2I, you can use the oc new-build command to create a BuildConfig.
The command to create a new build from the command line is:
oc new-build <builder-image>~<repo-url> ...
In this example, I’m providing details of a builder image that I want to use, to build my code.
You can get builder images for several different languages. For example:
-
Ruby.
-
Java applications: you can use fabric8/s2i-java, which you can find at Docker Hub (source code here).
Example: Building a Java Maven app with oc new-build
This quick example shows you how to create a S2I build for a Java application on OpenShift.
I’ve created an example Java application (using Spring Boot), so you can follow along with these example steps. My sample app uses Maven as its build tool.
Have a look at the example repo below. (You don’t need to clone the repo though, as all the commands below tell OpenShift to fetch the code directly from GitHub.)
View the application source code on GitHub
So, to create a new BuildConfig and start a build for my demo app:
-
Create a new build using the
oc new-buildcommand.If you’re working with the community edition of OpenShift, okd, then you can use the fabric8 s2i-java builder image:
oc new-build fabric8/s2i-java~https://github.com/monodot/simple-camel-spring-boot-app \
    --name=my-demo-app \
Or, if you’re using Red Hat OpenShift Container Platform, then you’ll need to make sure you’ve set up OpenShift authentication to the Red Hat registry, and you’ll be using the Red Hat UBI Java image instead, which is OpenJDK installed on RHEL. Here I’m using the
ubi8/openjdk-11image:oc new-build registry.access.redhat.com/ubi8/openjdk-11~https://github.com/monodot/simple-camel-spring-boot-app \ --name=my-demo-appThis command will:
-
pull the builder image (either from Docker Hub or Red Hat’s Container Registry)
-
create ImageStreams to point to the builder image, and your application’s container image, once it’s been built.
-
create a BuildConfig using source-to-image, pointing at the repository which contains my source code
-
start the build!
-
-
Now we can check on the status of the build using
oc get builds:$ oc get builds NAME TYPE FROM STATUS STARTED DURATION my-demo-app-1 Source Git@845ad07 Running 30 seconds agoAnd shortly after…
$ oc get builds NAME TYPE FROM STATUS STARTED DURATION my-demo-app-1 Source Git@845ad07 Complete About a minute ago 1m1s -
Once the build is complete (as my example shows above), we can check the image has been built by getting all ImageStreams:
$ oc get is
NAME          IMAGE REPOSITORY                          TAGS     UPDATED
my-demo-app   default-route.../toms-builds/my-demo-app  latest   11 seconds ago
openjdk-11    default-route.../toms-builds/openjdk-11   latest   43 minutes ago
An example S2I BuildConfig YAML
Want to see what a basic BuildConfig looks like? If you go through the example above, then the oc new-build command will create and apply a BuildConfig that looks something like the example below.
This BuildConfig defines:
-
a source-to-image build
-
a builder image, which is an ImageStreamTag,
s2i-java, which points to the image we’ll use -
an output image to build to, which is to an ImageStreamTag named
my-demo-app:latest
Here’s the BuildConfig as YAML:
apiVersion: build.openshift.io/v1
kind: BuildConfig
metadata:
  labels:
    build: my-demo-app
  name: my-demo-app
  namespace: toms-builds
spec:
  failedBuildsHistoryLimit: 5
  nodeSelector: null
  output:
    to:
      kind: ImageStreamTag
      name: my-demo-app:latest
  postCommit: {}
  resources: {}
  runPolicy: Serial
  source:
    git:
      uri: https://github.com/monodot/simple-camel-spring-boot-app
    type: Git
  strategy:
    sourceStrategy:
      from:
        kind: ImageStreamTag
        name: openjdk-11:latest
    type: Source
  successfulBuildsHistoryLimit: 5
  triggers:
  - type: ConfigChange
  - type: ImageChange
Got any questions about building images in OpenShift? Looking forward to your feedback and comments below! Cheers!
Comments
What do you think? You can use Markdown in your comment.
To write code, indent each line with 4 spaces. Or, to paste a lot of code, you can put it in pastebin.com and share the link in your comment.